


visionOS - From Zero to Hero - #3
#visionos #visionpro #apple #game #tutorial

In this newsletter, we use the base we created last time and start with the essence of the game. I will also add more base functionality as we need to implement those features. But now let’s begin without further ado!
Place the Rings
As you remember, the game's goal is to place some rings in the scene so we can fly through with a little airplane. What must be done to add this functionality:
Choose a position where the ring should be placed
Add the ring to the scene
Go to the next position where you want to place a ring
Choose a position
I have already created a little button in front of the head, which we can tap if we want to choose this position. So that’s already done. But there is a little challenge. We don’t have that position; we just have placed an anchor, and visionOS handles the rest. So that’s the first we do. Find a way to get the head position.
worldTracking.queryDeviceAnchor(atTimestamp: CACurrentMediaTime())As you see, we need world-tracking for this and must query that position. It’s not stored like in other platforms in some easy-to-access object. So, the best way to add that query is to create a class and do all the functionality to access the head position (head pose) there. This is all done in RBHeadPose.swift, and you can use this class for your projects “as-is”.
The usage is simple because it’s implemented as a Singleton:
Start ARSession: RBHeadPose.instance.runArSession()
Now you can access the position whenever you need: RBHeadPose.instance.position
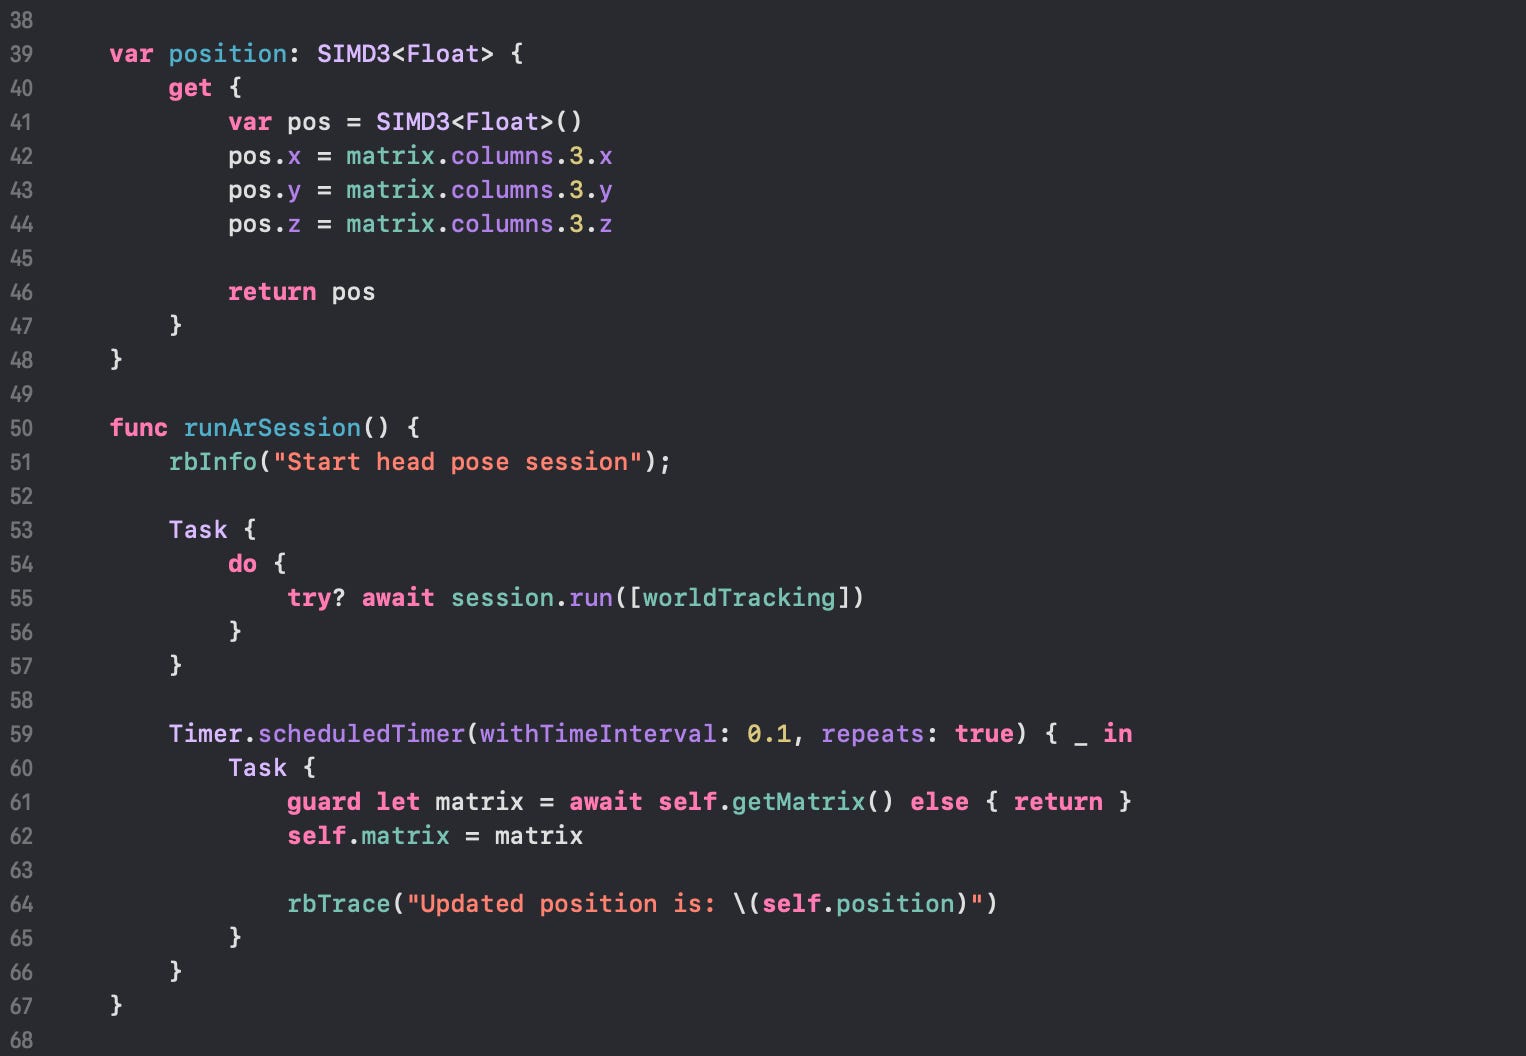
The timer is needed to get a regularly updated head position. Other implementations are possible, but that one easy to implement.
Create and Place a Ring
Now that we have a position to place a ring, we have to solve the following “problem”: How we get a ring into the scene. For that, we have mainly two solutions:
Create or buy a 3D model (as we see later with the airplane)
Create a ring programmatically (that’s what we do now)
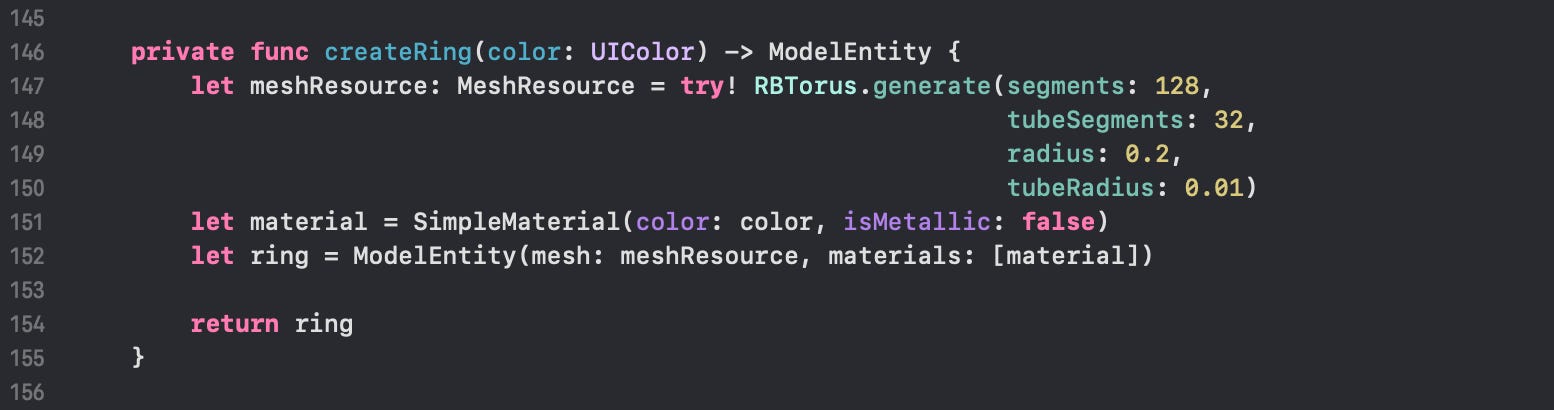
Every 3D object consists of a MeshResource and some Material we can apply. Complex models are typically created using 3D software like Blender. But to show how this also can be done programmatically, the rings are perfect :)
RealityKit already offers already many 3D Primitives, such as cubes and cones. Unfortunately, there is no “Ring” primitive, but a ring is ultimately a torus, a 3D primitive that is relatively easy to create.
The first step is to create a MeshResource. A MeshResource is defined by a list of vectors (points) and an index list that defines the order and connection between the points. RBTorus.swift does that for you by providing a static function you can call with RBTorus.generate(). The parameters needed are:
segments: Number of segments in the toroidal direction
tubeSegments: Number of segments in the poloidal direction
radius: Distance from the center of the torus to the center of the tube
tubeRadius: Radius of the tube
The result of this function is a MeshResource, which we use together with a SimpleMaterial to create a ModelEntity, which acts as a ring in the game.
To place the ring in the scene, just a few more lines of code are needed.
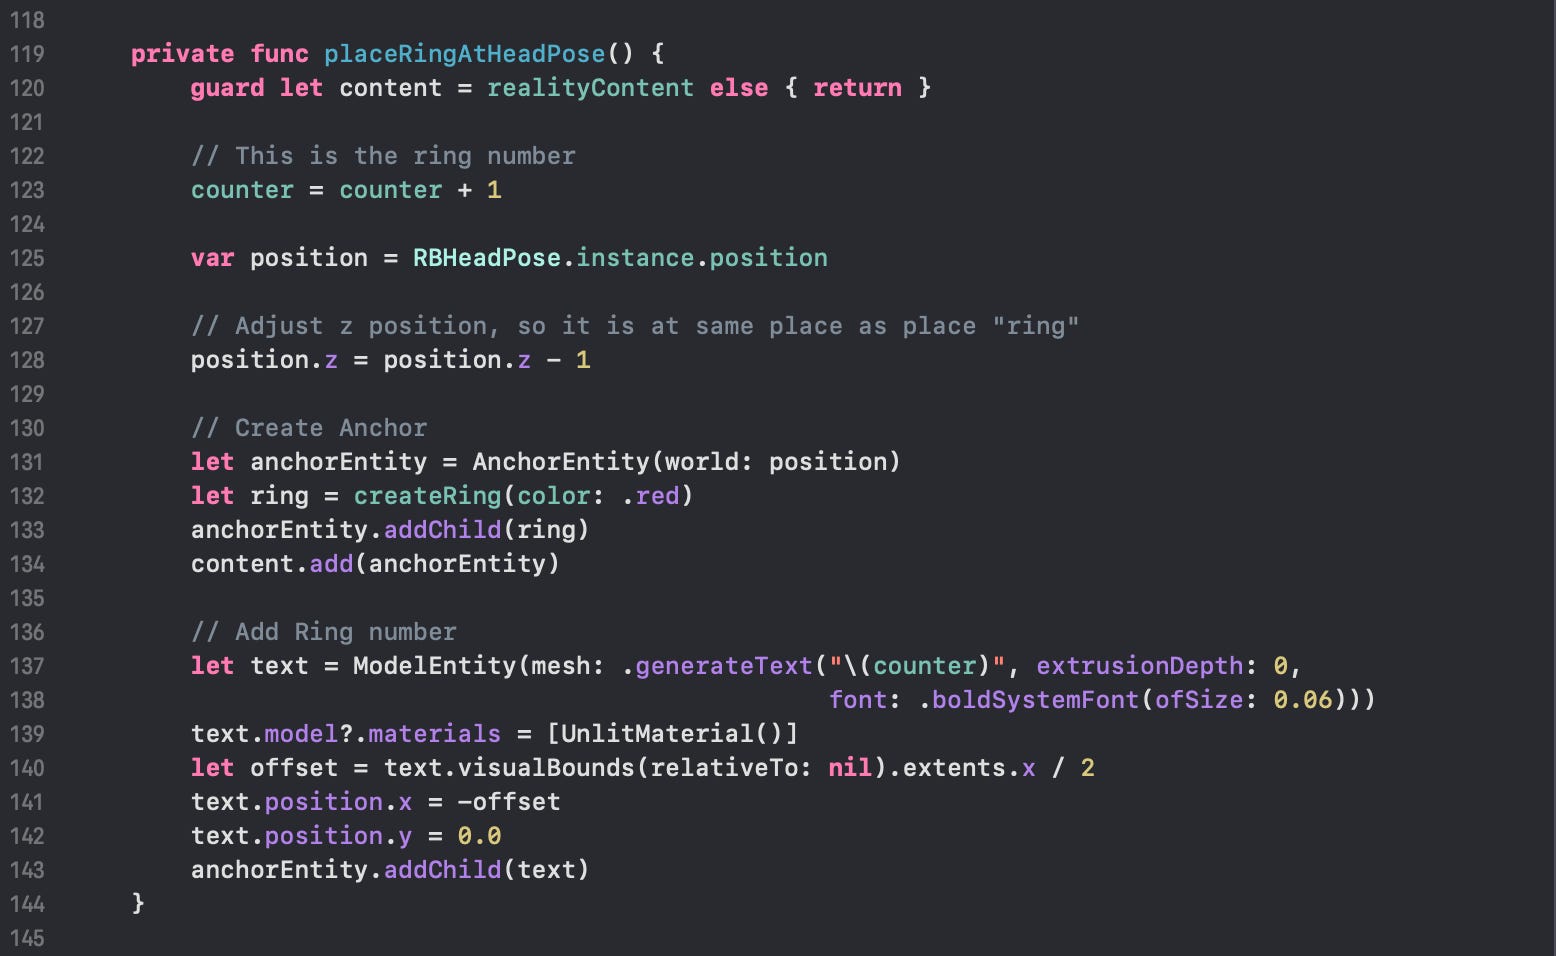
At the selected position, an AnchorEntity is created, and the ring, including a text for numbering, is added as a child.
Place Airplane
The rings are not the only game elements we need to place in the scene. We also need an airplane. This is a 3D model that is finally too complex to add programmatically. We don’t have to do this because Apple provides a variety of sample models we can use. This is not done in XCode but in Reality Composer Pro. This is more or less a simple scene creator that allows us to place 3D models, among other things, which we learn more about later.
Reality Composer Pro
A reality package is added by default when you create a visionOS project with XCode. To open this package, you can do that in Finder or directly in XCode.
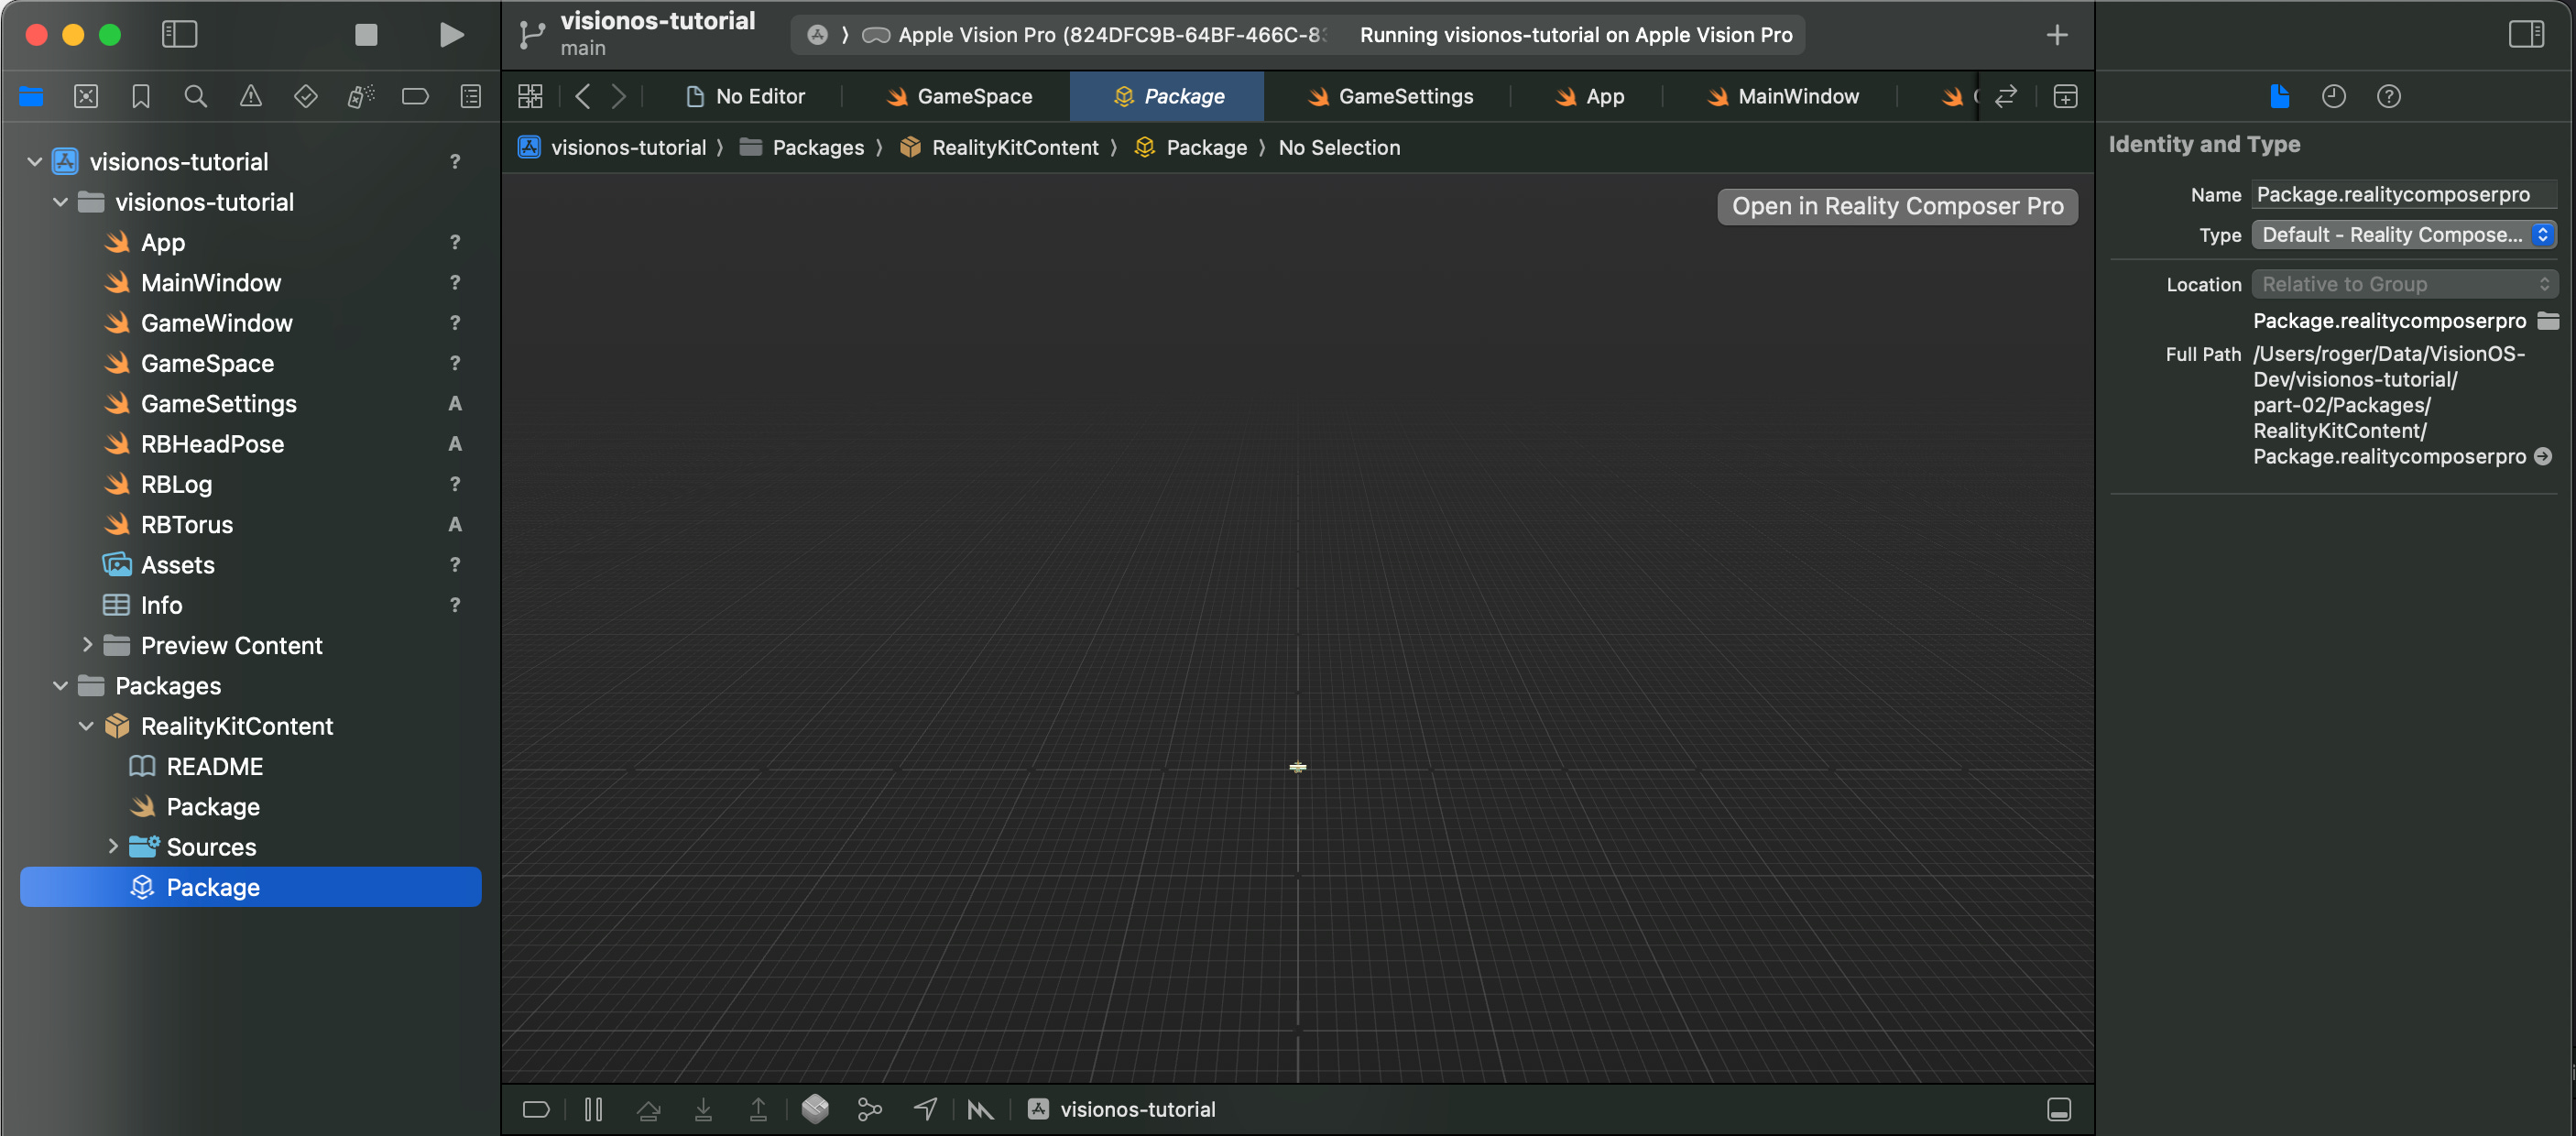
In Reality Composer Pro, you will see a view like this. To add a 3D model to the scene, you use the little “+” button at the top right corner, and you get a preview of all the available Assets.
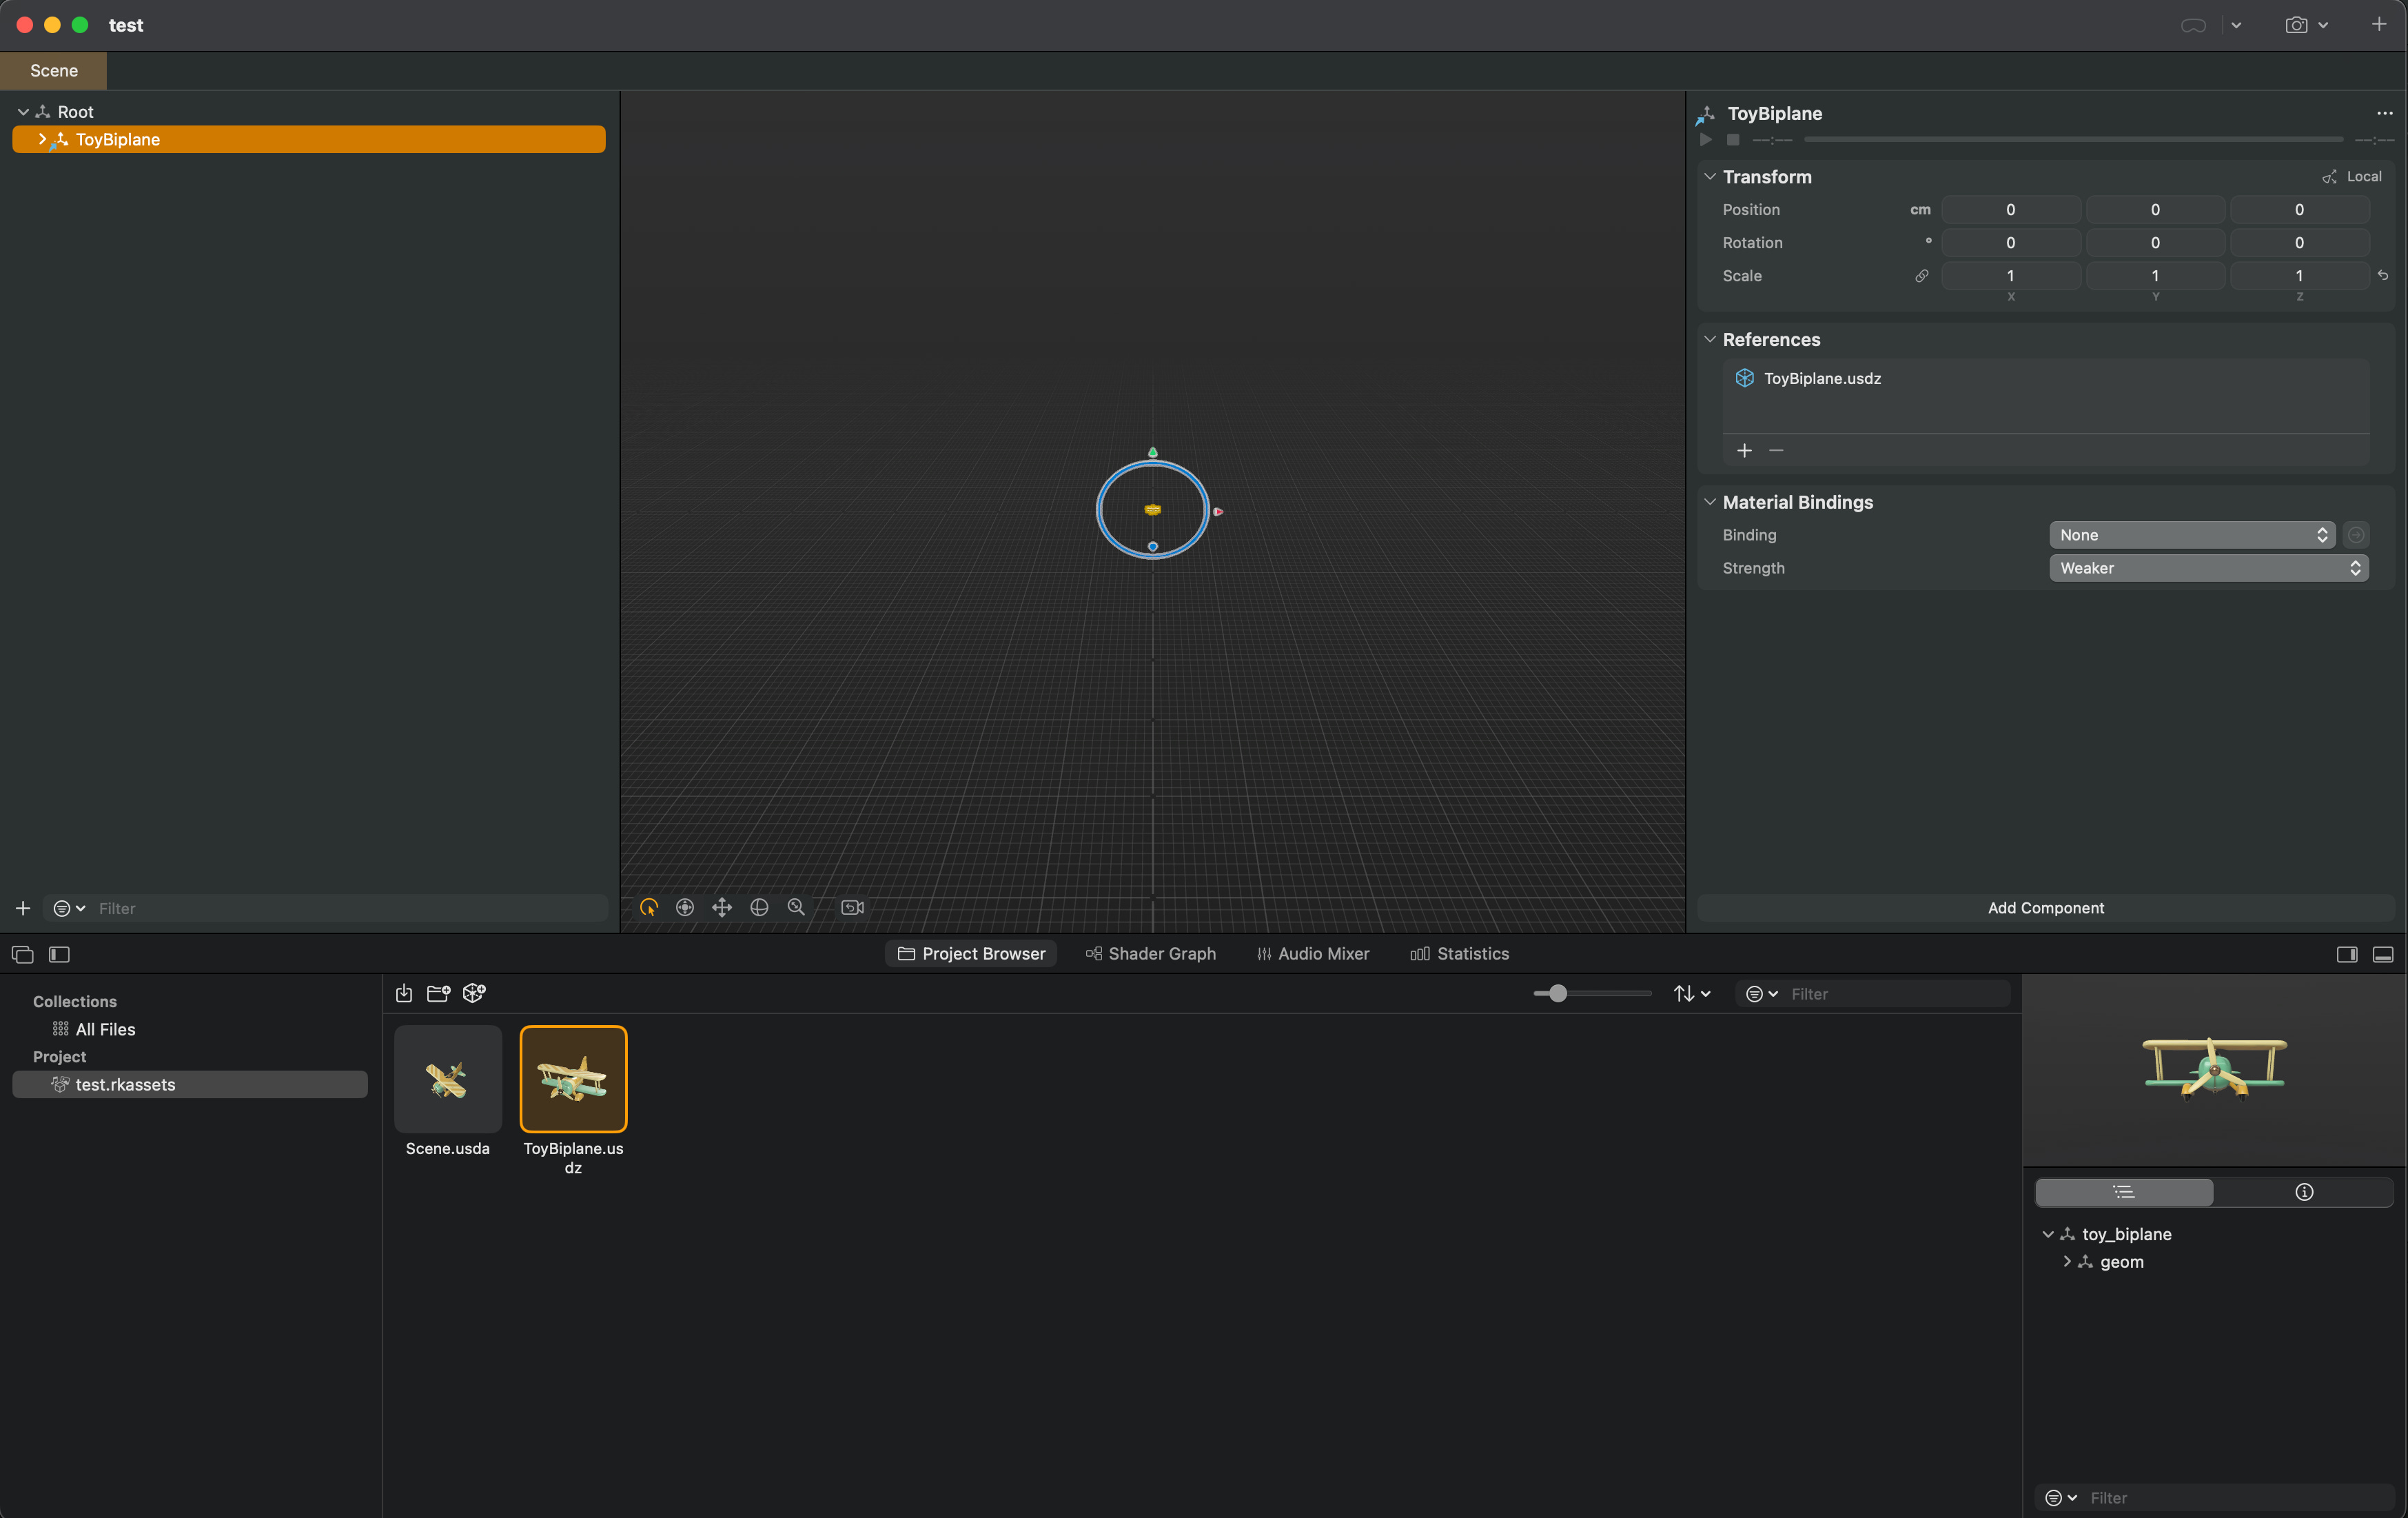
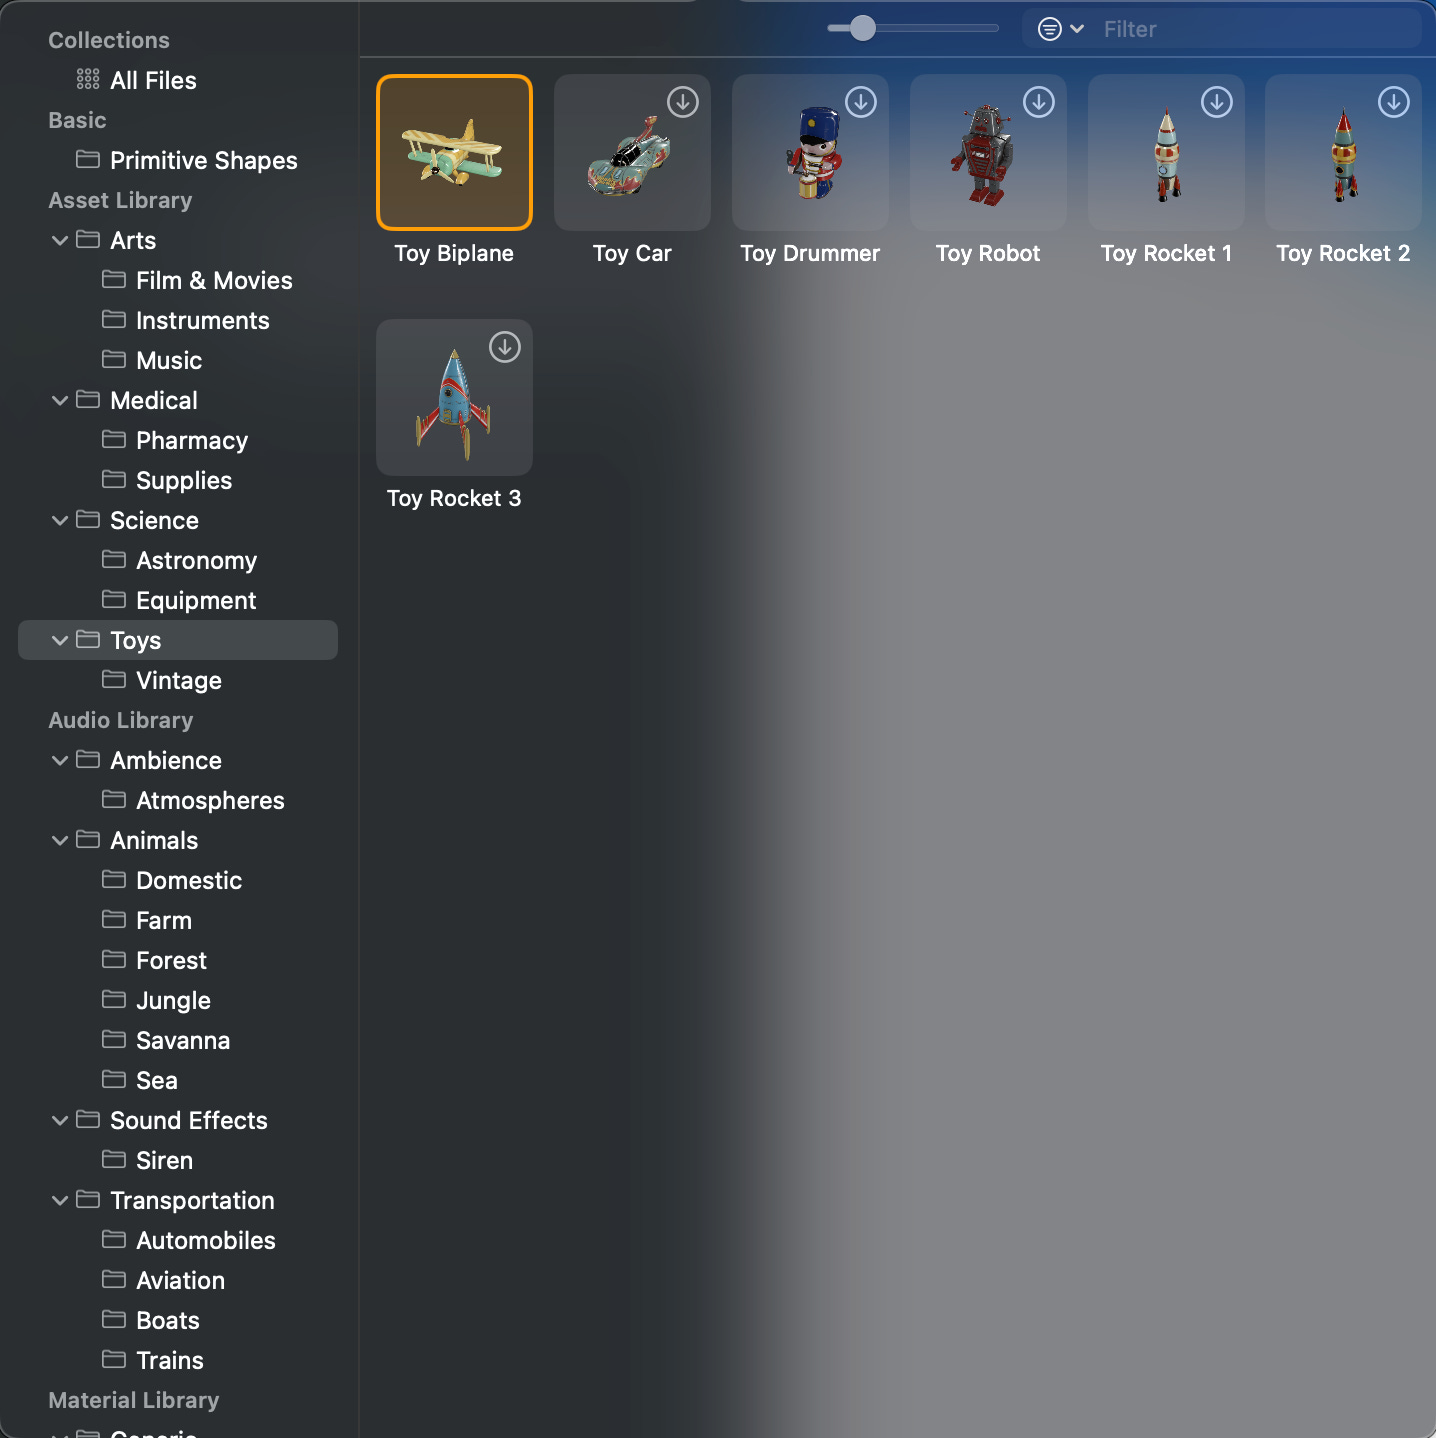
We use the little “Toy Biplane” for this tutorial. Press the little download icon when you want to use an asset for the first time. The model will then be locally available, and you can add it to your project by “drag & drop” it into the scene.
We can change its position, rotation, scale, etc., but we don’t have to do this except for the scale. We should set this to 0.5 so the airplane is not too big later in the game. Remember that you can also do all this later in the code.
Important: Whenever you change here, you must save it before you build it again in XCode. Otherwise, the old information is used. Something that sometimes happens to me … ;)
Usage of 3D Models
With the airplane in our project, assign it to the code to use it. There are many ways to do that, but the simplest way is to create a reference in a variable: private var airplane: Entity? = nil in the GameScene and assign with the following code during the creation time of the RealityView

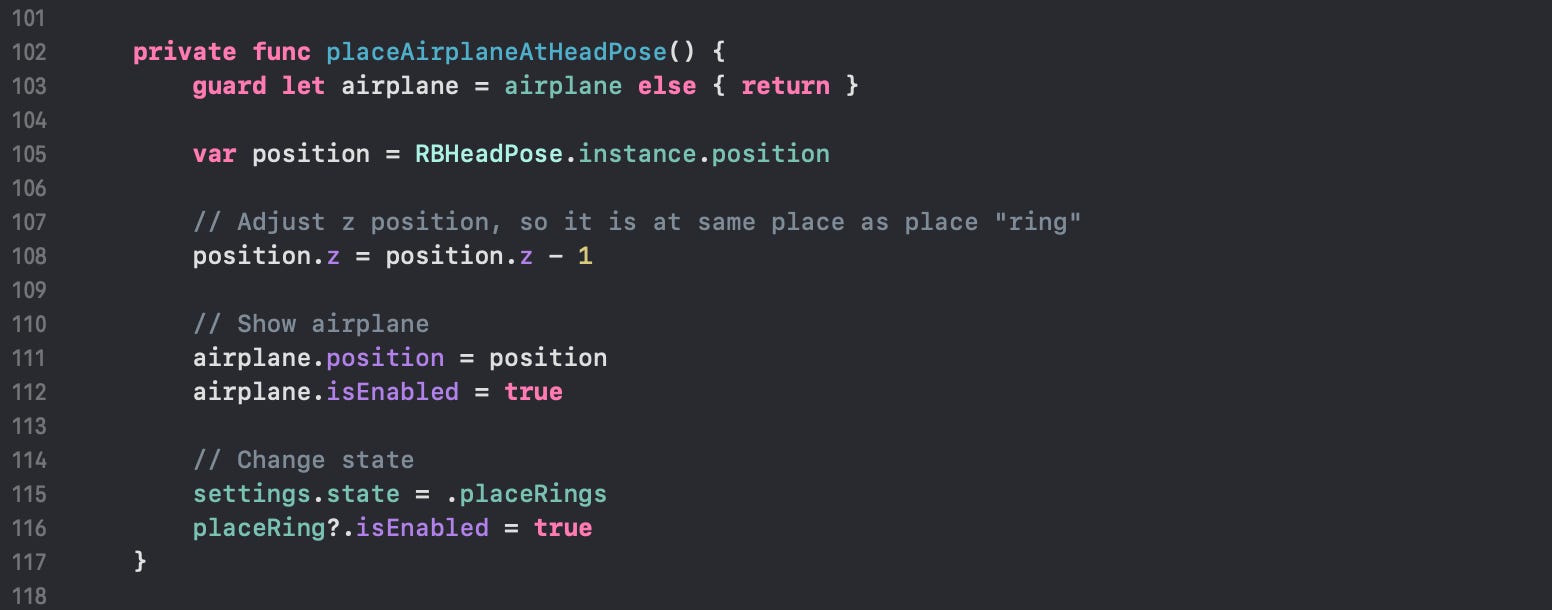
Now that we have a variable for the airplane in the code, we can place it like the rings. The difference is that we don’t create it by code but make it visible and show it at the chosen position.
That’s it. We have all the functions ready to create all the game objects. Just one thing remains. We have to change the user interface to place the aircraft and, later, the rings. We can stop it when we are done and want to start playing. This is super comfortable with SwiftUI.
Game states and User Interface
Our UI should change depending on the current game state. Therefore, it is best to define the possible states at first.
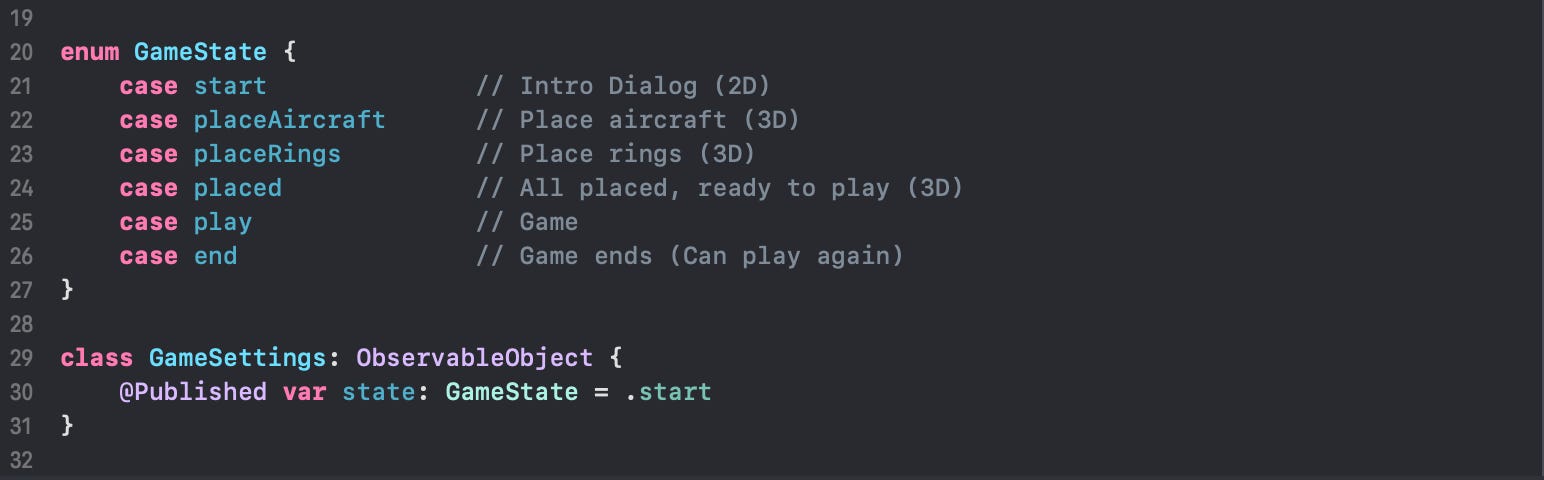
Those are the different states in the game, and we can now use them to update the Windows, Buttons, and Texts.
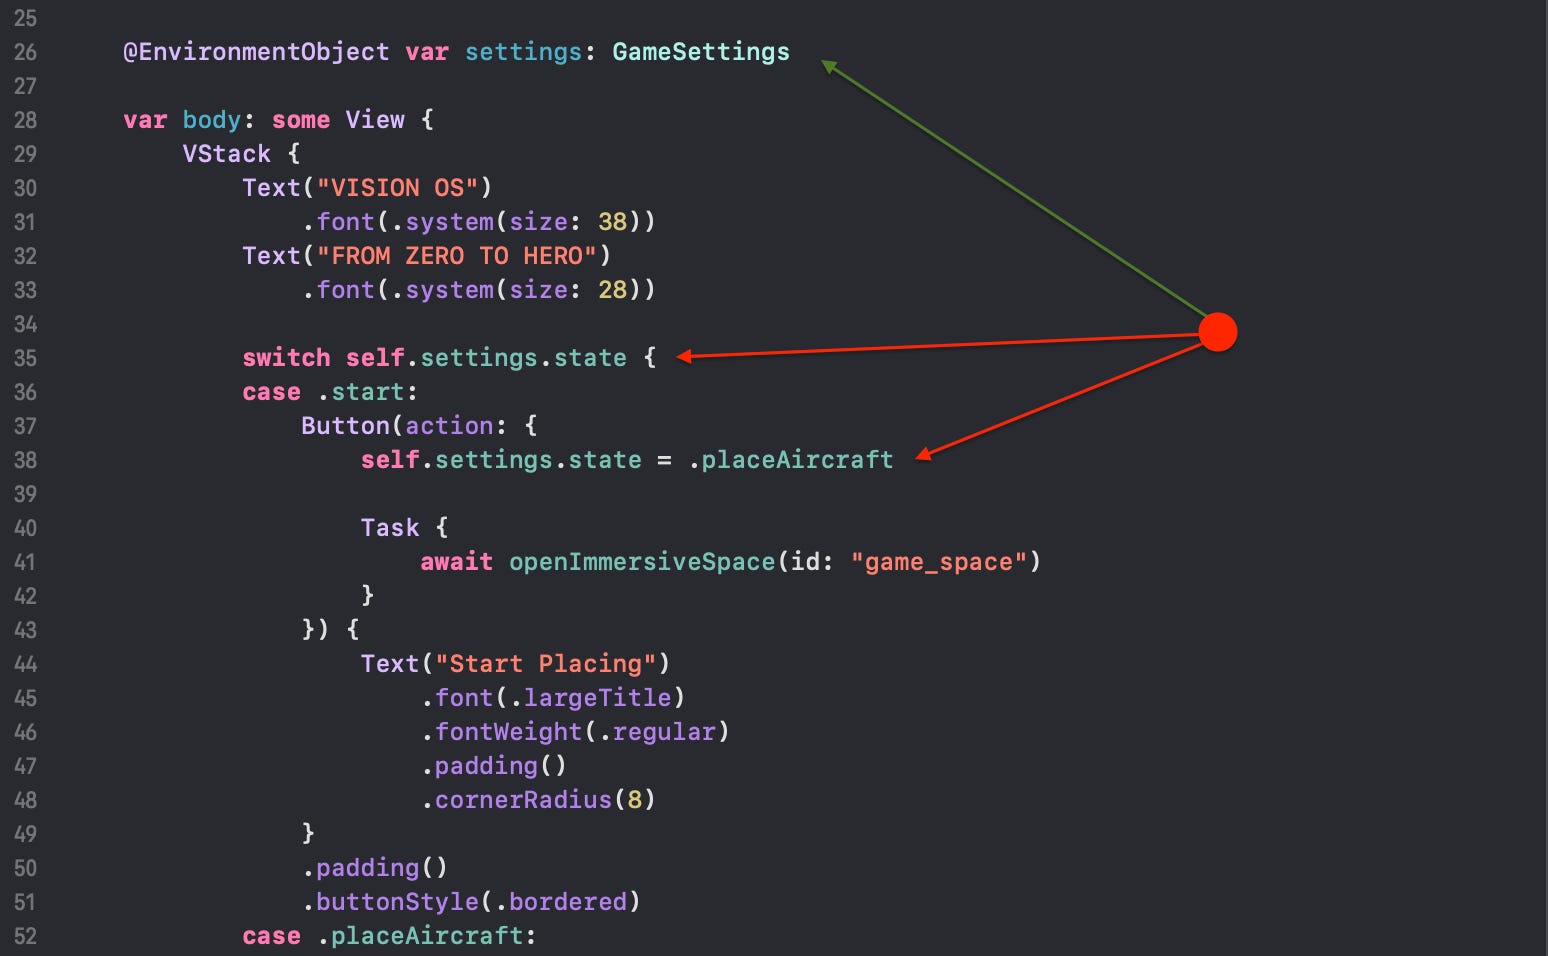
For this, we declare it as StateObject in the App and pass it as EnvironmentObject to the individual Windows and the GameSpace.
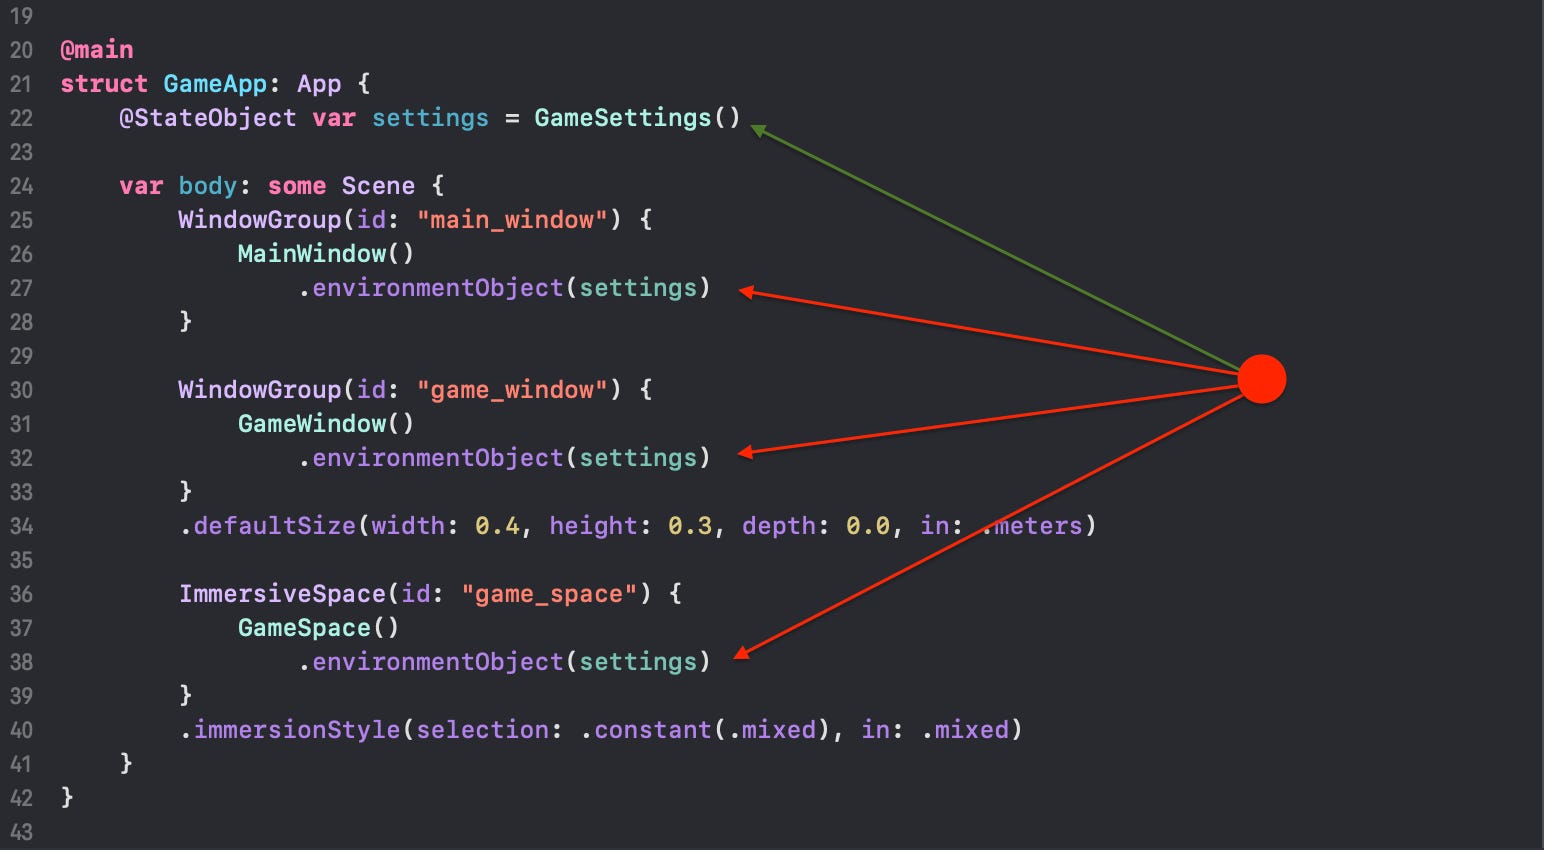
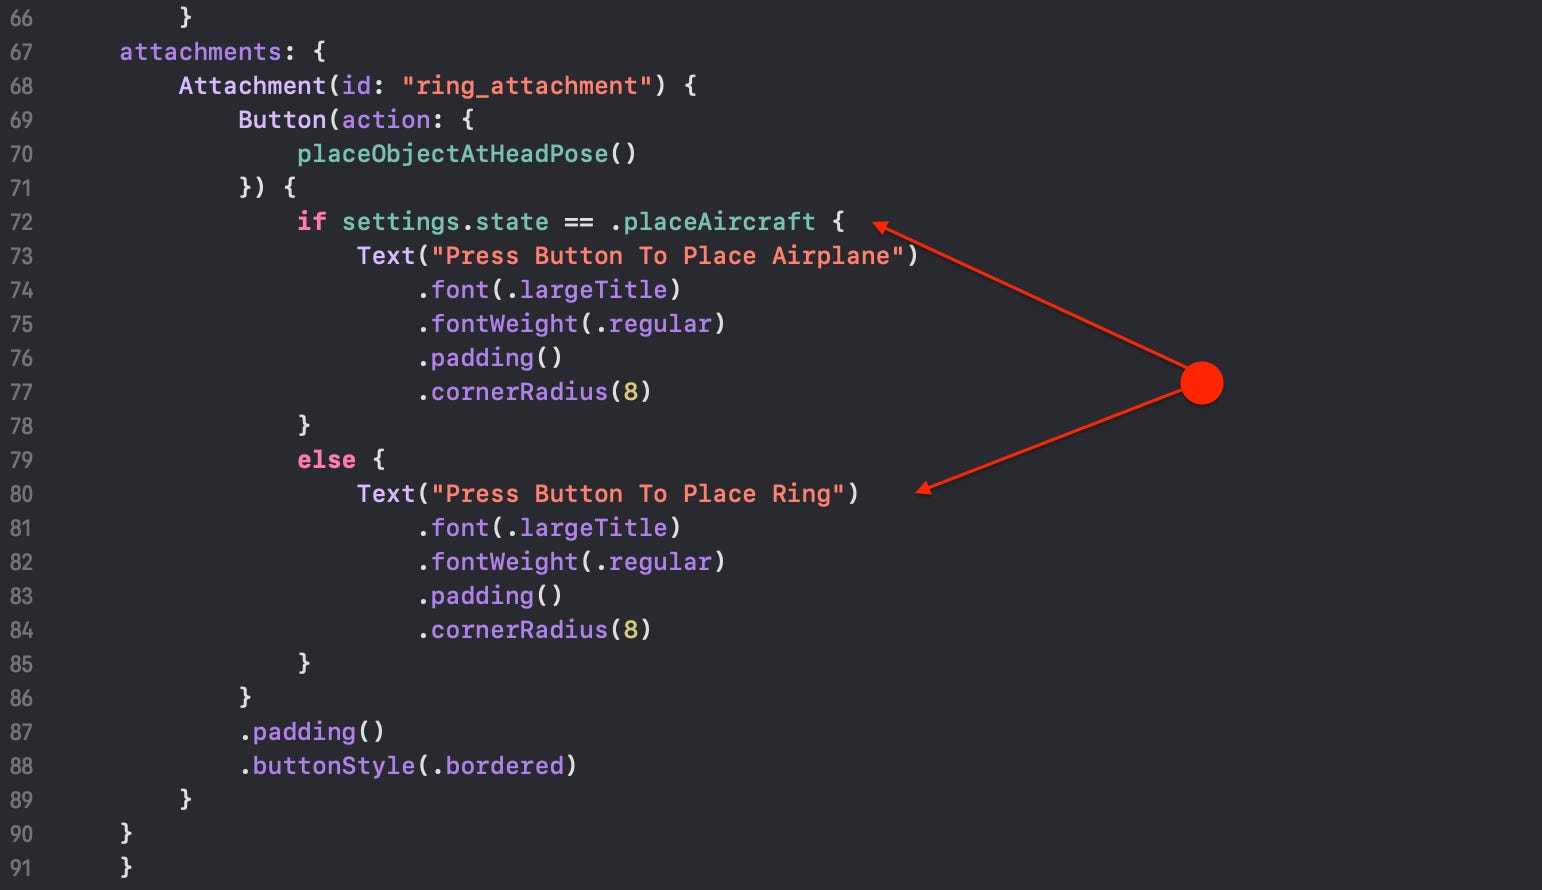
The state in settings can be updated, and the UI will change accordingly. In the MainWindow, we modify the button text, and in the GameSpace, we update the text and action of the button in the attachment “ring_attachment“.
Testing and Debugging
With that, we have almost reached the end of this newsletter. One topic I want to add. You have probably seen statements like rbDebug, rbTrace, etc. Those are only print statements with some added logic. You can add a severity. That means you can define the message level you want to see in the XCode console window. You might wonder why I do not just use print or the iOS log system itself. In simple words, I can easily extend and customize it to meet my needs. In one of the following newsletters, we will see how I can display those log messages even in visionOS so you can see them when you wear the glasses.
Of course, the debugger is also a possibility, but debugging on the device with a multi-thread application (as almost every visionOS application is) can be very challenging, so the log is sometimes the best way to get some insight information.
What’s next?
If you try today's code either in the simulator or, even better, on the device, you should see something like the above video. Can you find the issue we have in the code? No?
The following newsletter, where we also talk a bit more about linear algebra, will show and explain it to you. Also, I will add the code needed to let the airplane fly and explain some important and general concepts around game programming.
The source code for this tutorial you find on GitHub

Please also consider subscribing to my YouTube channel, where I post more stuff related to the Apple Vision Pro and an upcoming game for visionOS I'm working on.